

Installing curtains may seem easy, but getting them perfectly straight and stylish is trickier than most people think. Many homeowners struggle with crooked rods, uneven panels, or rods that fall off walls. Learning how to install curtain rods properly can transform any room instantly. Whether you live in an apartment, a rental, or a house, this guide will show you how to hang curtains like a professional. We will cover everything from measuring for curtain rods, choosing the right rod, installing without drilling, to pro tips for beginners. By the end, you’ll feel confident handling all types of DIY curtain rod installation.
Understanding the correct curtain rod bracket placement, measuring height, and picking the right hardware are crucial. Improper placement can make your windows look smaller, reduce natural light, or even damage your walls. With this guide, you will learn not only the practical steps but also the aesthetic tricks that designers use to make windows appear larger and rooms feel brighter. Using tools needed to install curtain rods effectively and avoiding common mistakes will save you time, effort, and money.
How to Install Curtain Rods Without Drilling (
Installing curtain rods without drilling is a lifesaver for renters or anyone who doesn’t want to damage walls. There are multiple solutions available, including tension rods, magnetic rods, and adhesive curtain rod brackets. Tension rods work by fitting snugly inside the window frame or between two walls. Magnetic rods attach to metal frames or doors, while adhesive mounts stick directly to walls without leaving marks. The key is checking the weight limits of each solution, as heavier curtains may require more support. This method is perfect for apartments, dorms, or temporary setups.
No-drill installation has other advantages beyond preventing wall damage. It allows flexibility to move rods between rooms or adjust placement without leaving holes behind. For example, installing lightweight sheer curtains over a small kitchen window using a tension rod creates a clean, professional look. Adhesive mounts, on the other hand, are excellent for plaster walls or areas where studs are unavailable. Always consider the fabric weight and window size before deciding, and remember that using these solutions is an easy way to achieve designer-level curtain hanging without professional help.
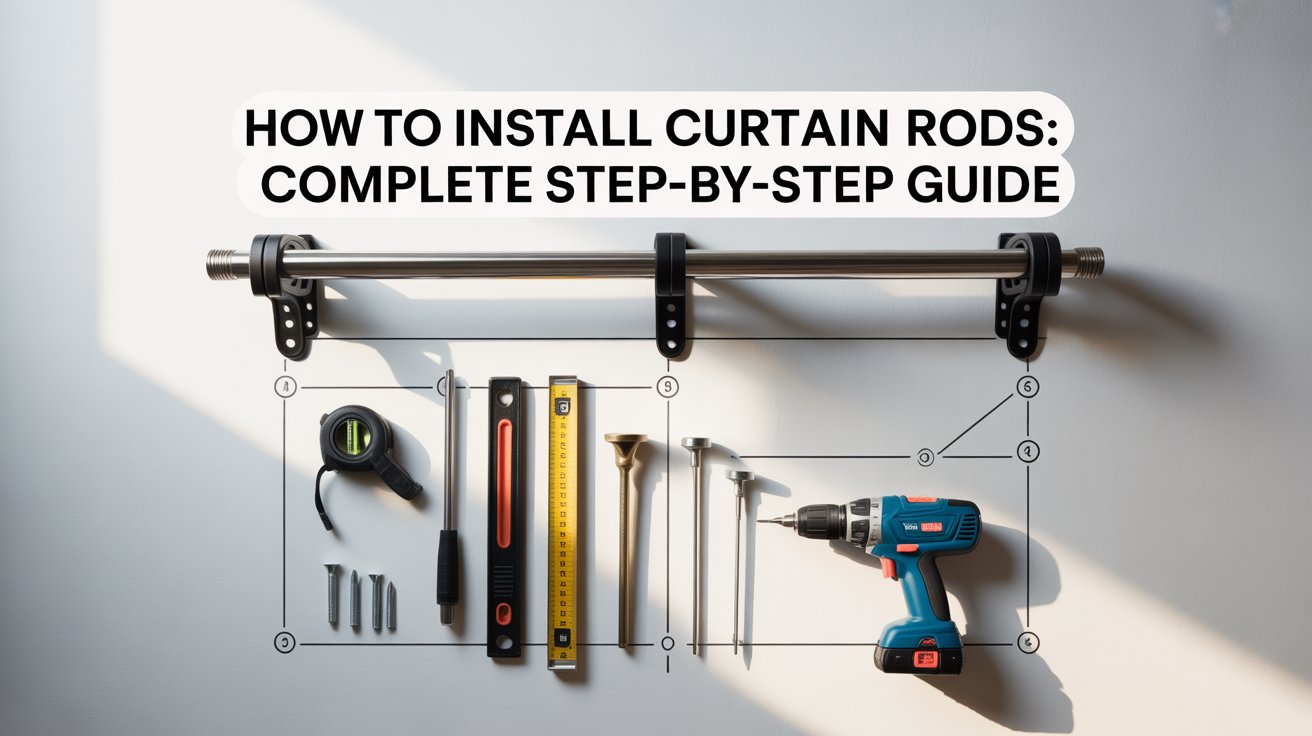
Tools and Materials Needed for DIY Curtain Rod Installation
Before starting, it’s essential to gather the tools needed to install curtain rods. Basic tools include a measuring tape, level, screwdriver, and optionally a stud finder. For heavier curtains, a drill with wall anchors for curtain rods or toggle bolts is recommended. Optional tools like masking tape, pencils, and step ladders make the process easier and more precise. Having everything ready avoids frustration and ensures smooth installation, especially for DIY curtain rod installation for beginners.
Materials include the rods themselves, brackets, screws, and the curtains or drapes you want to hang. Decorative finials or tiebacks can enhance the room’s appearance. Choosing the correct hardware is vital. Using the wrong curtain rod bracket placement or insufficient anchors can lead to sagging rods or walls being damaged. For renters, adhesive mounts or tension rods provide flexibility while ensuring the curtains hang safely. Understanding all your tools and materials before starting is the first step in a successful curtain rod installation for beginners.
How to Measure Windows for Curtain Rod Installation
Measuring windows correctly is one of the most important steps. Start with the width: measure the inside of the frame and add extra inches so curtains extend beyond the window. This creates fullness and ensures light is properly blocked. Also, measure the height from ceiling to floor. For standard windows, rods should be placed 4–6 inches above the frame to give a taller, brighter appearance. Proper curtain rod bracket placement ensures rods are level and evenly spaced.
Curtain panel size is equally critical. Panels should ideally be double the window width for a full look. Floor-length curtains create a formal, elegant feel, while sill-length panels are practical for kitchens and bathrooms. Consider the fabric: light fabrics may require more fullness, while heavier fabrics hang differently. Using a level during measurement prevents crooked rods, a common mistake even for experienced DIYers. Applying these simple steps ensures your curtains hang evenly, creating a professional and polished look.
How to Choose the Right Curtain Rod for Your Windows
Choosing the right curtain rod is more than picking a style. Rods vary in material, thickness, length, and type. Single rods work for simple setups, while double rods allow layering, such as sheers under heavier drapes. Extend rods 4–10 inches beyond the window frame to make windows appear larger. Proper rod length and thickness prevent sagging and maintain curtain rod spacing guide.
Material matters too. Heavy fabrics like velvet or chenille require strong rods with reinforced brackets. Light cotton or sheer panels can use thin rods or no-drill options. Beginner-friendly rods include pre-mounted brackets or tension rods for flexibility. Choosing the wrong rod can cause sagging, uneven panels, or even wall damage. Always consider curtain rod installation mistakes and pick hardware that matches your wall type and curtain weight.
How to Install Curtain Rods on Windows Without Drilling
Installing Tension Curtain Rods Step by Step
Tension rods are a great solution when you want to avoid drilling holes. Begin by measuring the width of your window carefully and extending the rod slightly beyond the frame. Adjust the tension so it fits snugly without slipping. Lightweight curtains, sheers, or small panels work best with tension rods. Using this method, you can achieve a designer-level finish without any damage to your walls or window frames.
Installing Magnetic Curtain Rods on Metal Frames
If your windows or doors have metal frames, magnetic curtain rods can be a perfect choice. Simply attach the magnetic ends to a clean, flat metal surface, and slide the curtain panels onto the rod. These rods hold light to medium-weight curtains securely. Magnetic rods are ideal for rentals and temporary setups since they require no drilling and can be moved easily.
Installing Adhesive Curtain Rod Brackets
For walls where drilling isn’t an option, adhesive curtain rod brackets are very handy. Clean the wall thoroughly, stick the adhesive mount, and allow it to set before hanging curtains. Check the weight limits and choose lighter fabrics to ensure the bracket holds. Adhesive solutions are especially useful on plaster walls and rental properties, allowing you to decorate freely without permanent damage.
Installing rods without drilling is simple but requires attention to detail. Proper measurement, checking how far curtain rods should extend, and using the right bracket type ensures your curtains hang evenly and look professional. No-drill methods offer flexibility and reduce the risk of mistakes commonly made by beginners in DIY curtain rod installation.
How to Install Curtain Rods on Drywall (No Damage Tips)
Understanding Drywall Weight Limits
Drywall is delicate and can’t always support heavy curtains without reinforcement. Use toggle bolts or wall anchors for curtain rods when installing heavier drapes. Light fabrics may be supported with standard screws if attached directly into studs. Checking the weight limits for your rod and fabric prevents loose curtain rods or damage to walls.
Best Curtain Rod Options for Drywall
For drywall installations, choose rods that distribute weight evenly. Single rods work for medium-weight panels, while double rods are ideal for layering sheer curtains under heavier drapes. Using stud finders ensures brackets are anchored into solid wood, avoiding sagging. Pre-drilling pilot holes is also a smart strategy, especially when working with plaster walls or older homes.
How to Avoid Wall Damage During Installation
To prevent damage, measure carefully, mark placement accurately, and use appropriate anchors. Avoid placing too many screws in one area and ensure brackets are level. Regularly checking curtain rod bracket placement and tightening screws helps maintain stability over time. Following these guidelines ensures your curtains hang securely and aesthetically on drywall without permanent harm.
Step-by-Step Instructions: How to Hang Curtain Rods Correctly
Marking the Correct Curtain Rod Placement
Begin by measuring your window’s width and height, then mark where the rod brackets will go. Most rods should be installed 4–6 inches above the window frame and extended 4–10 inches beyond the frame to create a taller and wider illusion. Correct placement prevents common curtain rod installation mistakes and ensures the panels hang evenly.
Installing the Rod and Adjusting Level
After marking, attach the brackets using the correct screws or anchors. Slide the rod into place and check alignment with a level. Adjust if necessary to ensure the rod is perfectly horizontal. Using a level is particularly important when installing heavy curtains, as even a slight tilt can be noticeable.
Hanging Curtains Evenly and Securely
Slide curtains onto the rod or attach with hooks. Ensure panels are evenly distributed and don’t bunch up at the ends. For heavier drapes, use a center support bracket to prevent sagging. Following these steps guarantees your curtains look professionally hung and prevents common beginner mistakes such as uneven spacing or crooked rods.
Common Curtain Rod Installation Mistakes (And How to Avoid Them)
Installing Curtain Rods Too Low or Too Narrow
Many beginners hang rods just above the window frame, making the window appear smaller. Instead, follow how high to hang curtain rods guidelines, positioning rods closer to the ceiling. Extending rods beyond the frame also helps create the illusion of larger windows, making rooms feel more spacious.
Using the Wrong Curtain Rod Type
Choosing a rod that doesn’t match the curtain weight or wall type can lead to loose curtain rods or sagging panels. Heavy fabrics need strong rods with reinforced brackets, while light curtains can use tension or adhesive solutions. Understanding the single vs double curtain rods installation options helps avoid unnecessary frustration.
Ignoring Curtain Weight Limits
Exceeding the rod or bracket weight limit is a common mistake. Heavy drapes require toggle bolts or wall anchors for curtain rods, while lighter fabrics can use simpler solutions. Always check specifications before hanging to ensure the rod supports the curtain fully and evenly, avoiding damage to walls or misaligned panels.
Curtain Rod Installation for Beginners: Pro Tips for Perfect Results
Professional Curtain Hanging Tips
Even as a beginner, you can achieve a professional look. Use tiebacks to control fabric, and hang rods slightly above the frame for added height. When layering curtains, choose single vs double curtain rods installation to create depth and dimension. Always measure twice and check for levelness before drilling or mounting.
How to Make Curtains Look Taller and Wider
For a dramatic effect, hang rods close to the ceiling and extend them well beyond the window frame. Floor-length curtains combined with curtain rod bracket placement at strategic heights create elegance and make rooms appear larger. Light fabrics add airiness, while heavier curtains provide a luxurious feel.
Maintenance and Long-Term Care Tips
Check rods and brackets periodically to tighten screws. Clean both rods and curtains regularly to maintain appearance. Using proper wall anchors for curtain rods prevents sagging over time. Maintaining curtain placement ensures that even after months of use, your installation remains professional and secure.
Conclusion
Learning how to install curtain rods properly can completely transform your home’s look. By measuring windows carefully, choosing the right rod type, and paying attention to curtain rod bracket placement, you can achieve a professional result even as a beginner. Using DIY curtain rod installation techniques, whether no-drill, drywall, or adhesive, allows you to decorate without damaging walls. Following these steps ensures your curtains hang evenly, look stylish, and enhance the overall aesthetics of your home.
Remember, correct installation, maintenance, and occasional adjustments keep rods secure and curtains looking beautiful. Using the tips, tricks, and methods in this guide, you can confidently tackle all window types, fabrics, and room styles, making your home look polished and elegant.
Frequently Asked Questions
How Long Should a Curtain Rod Be?
A rod should extend 4–12 inches beyond the window width to allow proper coverage and fullness. This ensures curtains can be fully opened and closed without obstruction, giving windows a polished appearance.
Can I Install Curtain Rods Without Tools?
Yes, for lightweight curtains, tension rods or adhesive mounts require no tools. They are renter-friendly and ideal for temporary spaces, allowing you to hang curtains securely without drilling or screws.
What Is the Best Curtain Rod for Renters?
Renter-friendly rods include tension rods, magnetic rods, or adhesive mounts. They avoid wall damage and are easy to reposition. For heavier fabrics, use rods with proper support brackets to maintain even curtain rod bracket placement and prevent sagging.
Tips for Arched or Oddly Shaped Windows
For arched windows, measure the widest and tallest points carefully. Curved tension rods or custom brackets can provide support while keeping curtains functional. Extending the rod beyond the arch maintains symmetry and helps light control.
How Can I Avoid Loose Curtain Rods Over Time?
Always use appropriate anchors for wall type. Check curtain rod bracket placement and tighten screws periodically. Avoid overloading rods beyond their weight limit and distribute panels evenly.

Wellcom to BudgetDiyDen! I’m Faizan Malik, an AI Powerd SEO , and Content writer withfour years of experience.
At BudgetDiyDen, where We shares simple, affordable home renovation and décor ideas. We focuses on practical tips, clever DIYs, and budget-friendly solutions that help homeowners transform small spaces with confidence.